DJI Osmo Pocket 3 पहली बार हाथ में लेने पर सबसे बड़ी परेशानी camera की quality नहीं, बल्कि यह होती है कि शुरू कहाँ से करें?
क्या पहले charge करना है या app install? microSD card कौन-सा लगेगा? Camera चालू करते ही gimbal क्यों घूम रहा है? DJI Mimo कहाँ से download करें? 4K 25fps रखें या 30fps? Anti-Flicker में क्या चुनें? ActiveTrack और autofocus क्या एक ही चीज हैं?
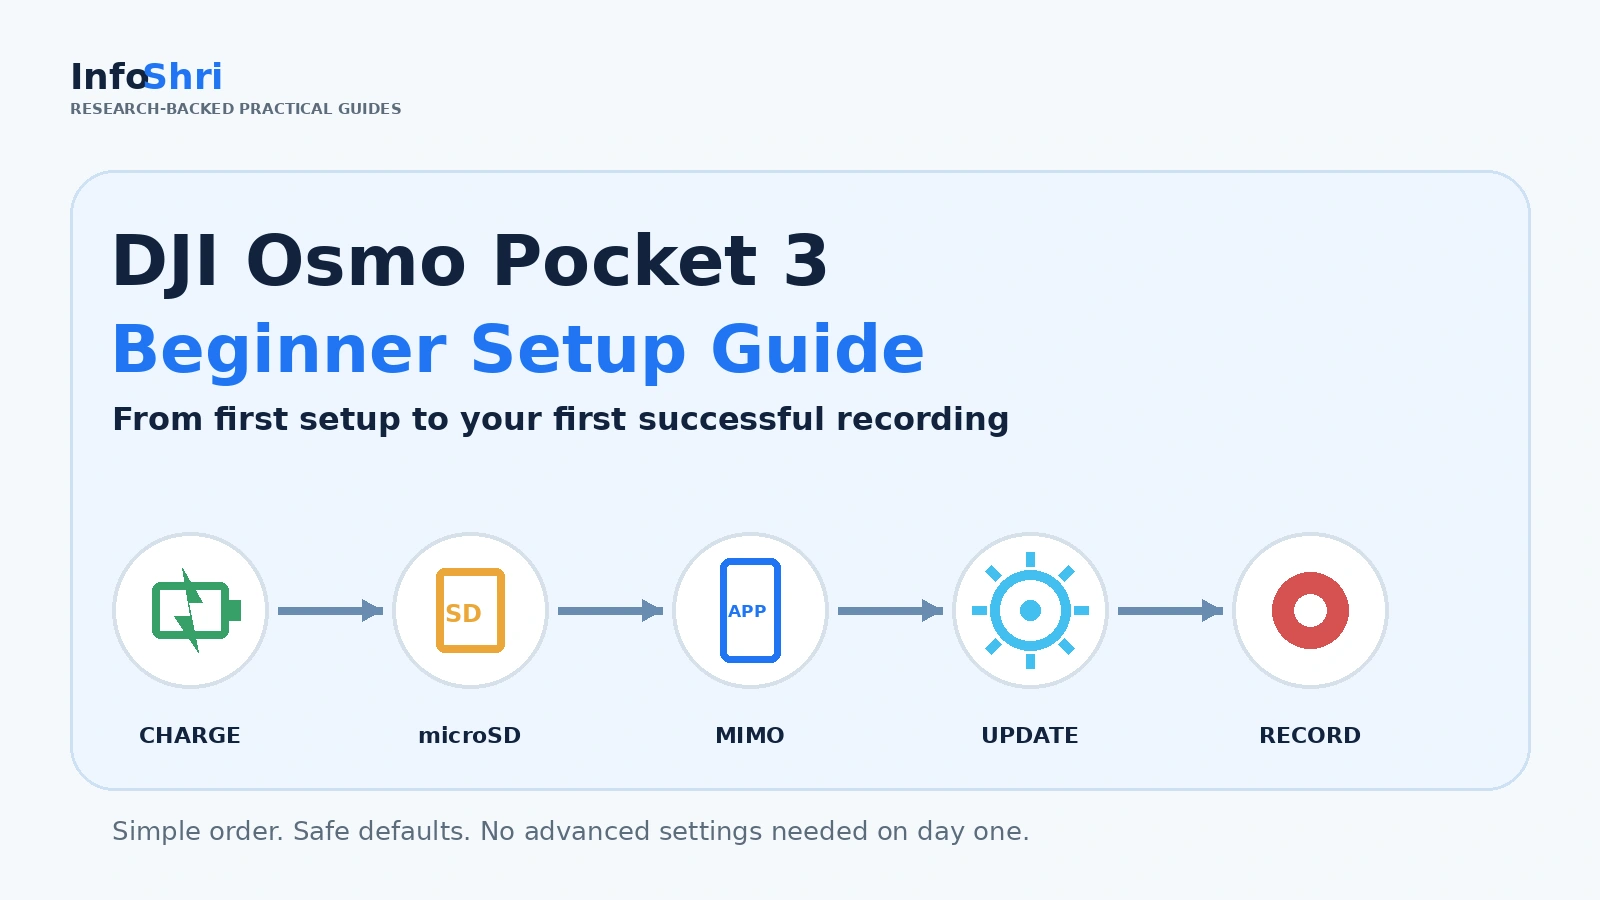
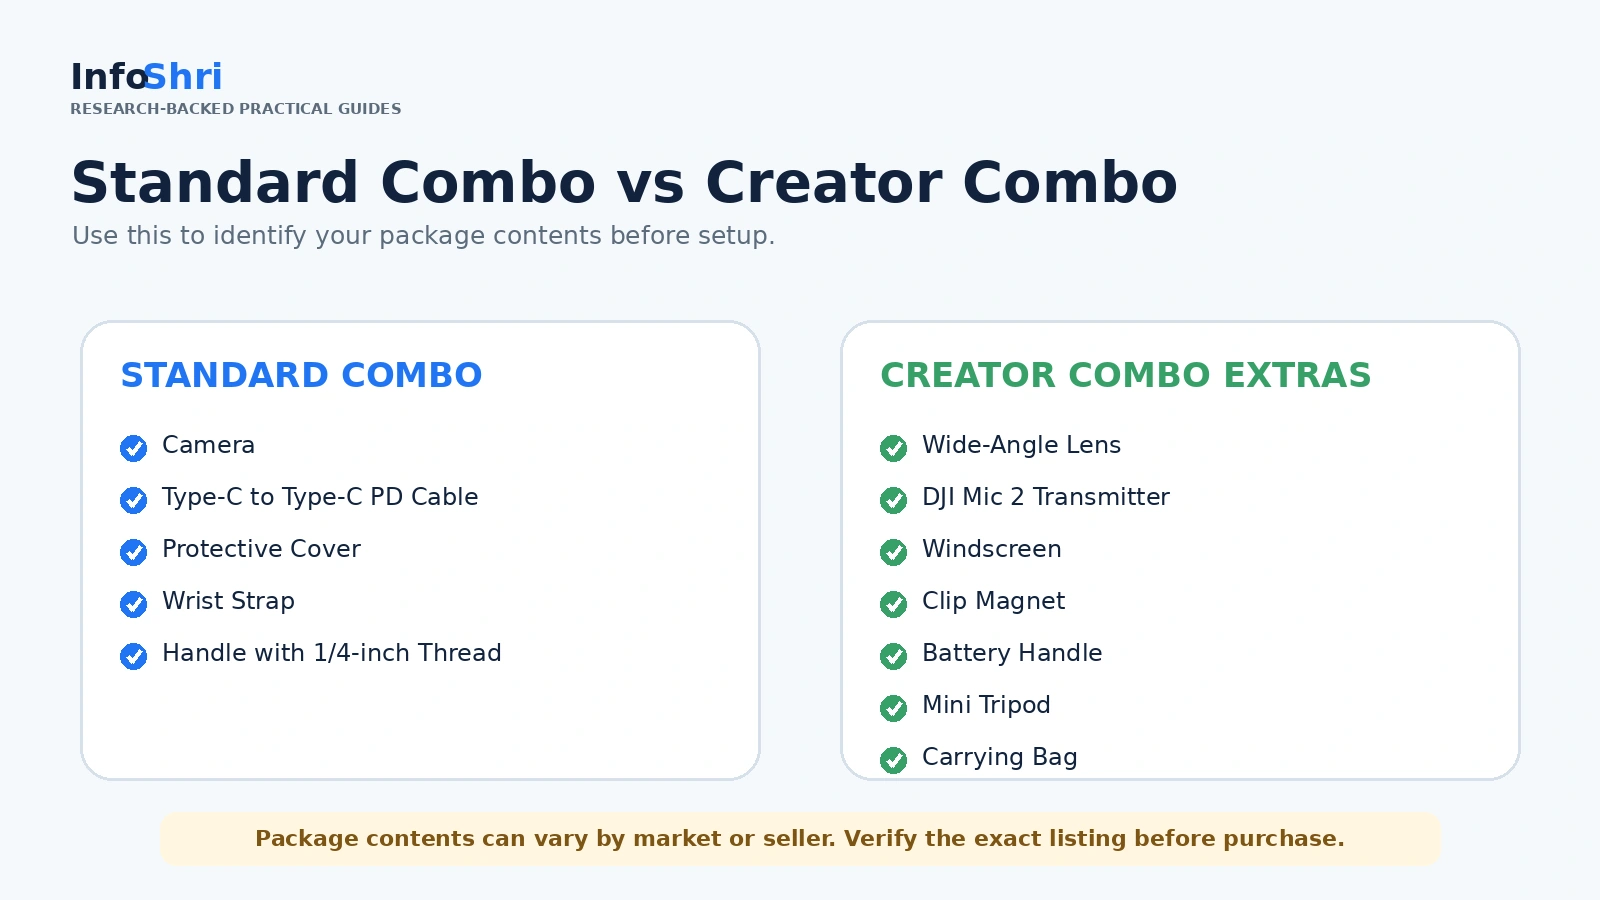
इस guide का काम इन्हीं सवालों को एक सही order में खत्म करना है। अगर आपने आज ही नया Pocket 3 खोला है, तो मोटे तौर पर workflow है: Box check → Charge → microSD insert → Power on → DJI Mimo install → Activate → Firmware update → Basic settings → Gimbal समझें → Focus और audio check करें → 10-second test video बनाएं → Playback करें → Backup करें → Camera safely store करें.
यह product review नहीं है और न ही हर Pocket 3 feature की list है। यहाँ सिर्फ वे चीजें हैं जो पहले दिन camera सही और safely चलाने के लिए जरूरी हैं।
Camera चालू करने से पहले: Box में क्या-क्या होना चाहिए?
सबसे पहले सारे accessories table पर रख लें। इससे बाद में किसी छोटी चीज को Creator Combo का हिस्सा समझने या Standard Combo में missing मान लेने की गलती नहीं होगी।
India Standard Combo
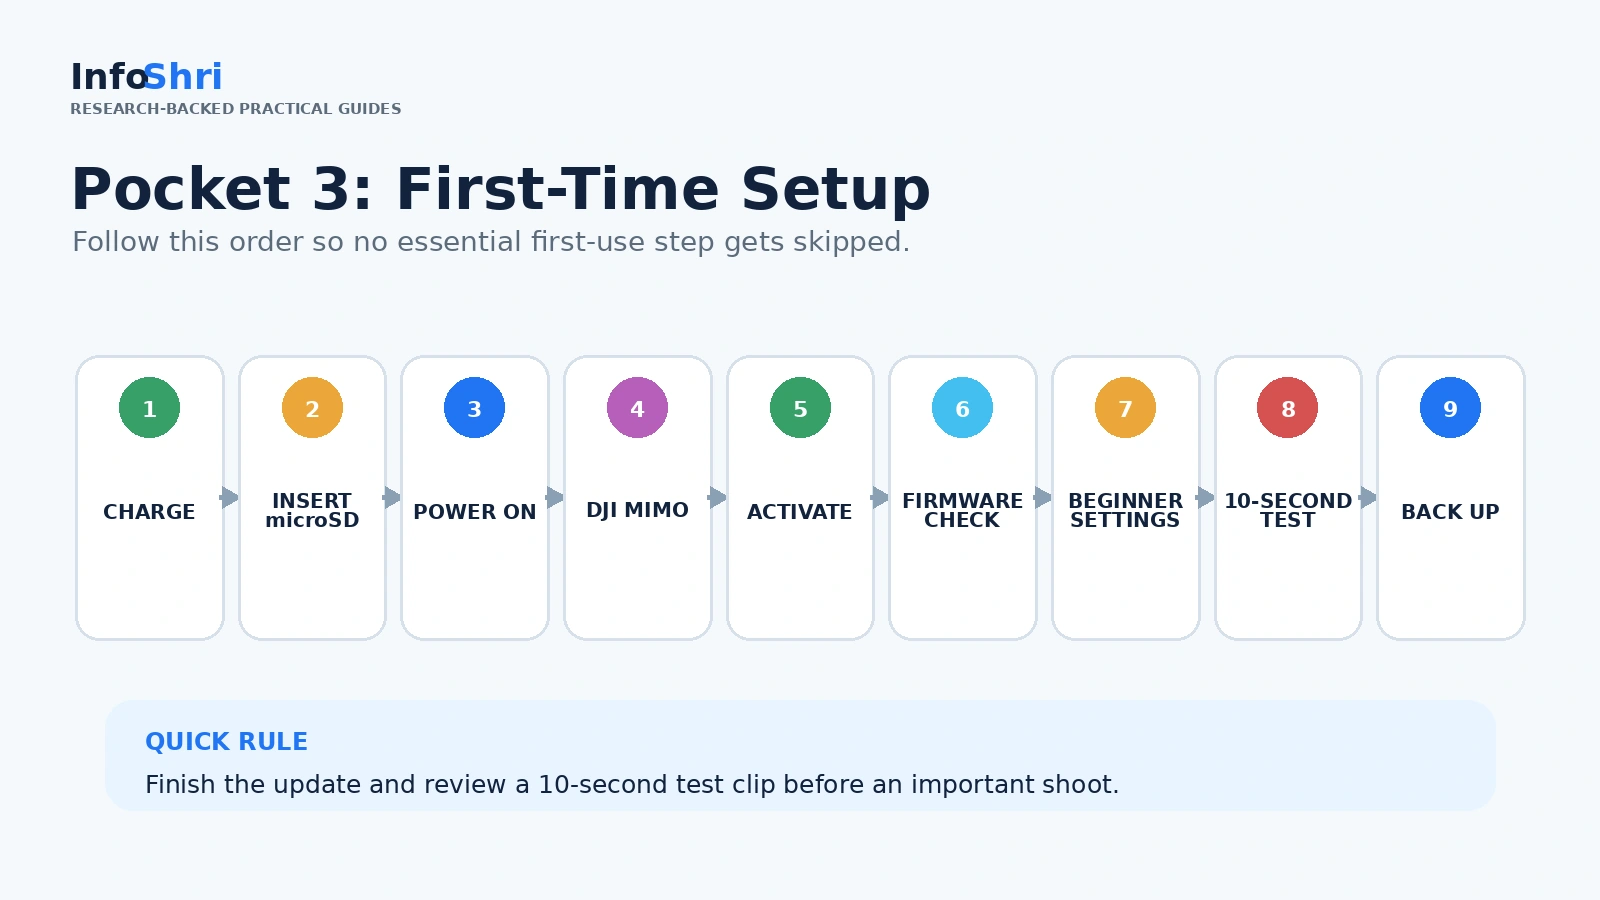
Current India listing के अनुसार Standard package में camera, Type-C to Type-C PD cable, Protective Cover, DJI Wrist Strap और 1/4-inch thread वाला handle शामिल हैं। Source: DJI India Standard Combo listing.
| Item | Standard Combo |
|---|---|
| Osmo Pocket 3 camera | Included |
| Type-C to Type-C PD cable | Included |
| Protective Cover | Included |
| DJI Wrist Strap | Included |
| Handle with 1/4-inch thread | Included |
| Wide-Angle Lens | Not included |
| DJI Mic 2 Transmitter | Not included |
| Battery Handle | Not included |
| Mini Tripod | Not included |
| Carrying Bag | Not included |
India Creator Combo
Creator Combo में ऊपर वाली common चीजों के साथ Wide-Angle Lens, DJI Mic 2 Transmitter, Mic 2 Windscreen, Clip Magnet, Battery Handle, Mini Tripod और Carrying Bag भी listed हैं। Source: DJI India Creator Combo listing.
इसलिए अगर किसी tutorial में Battery Handle या wireless mic दिखे और आपके Standard Combo में वह न मिले, तो जरूरी नहीं कि आपका box अधूरा हो।
Beginner Recommendation: पहली setup के दौरान Wide-Angle Lens, ND filter या कोई third-party magnetic filter लगाने की जरूरत नहीं है। पहले camera को basic configuration में चलाना सीखें।
First Safety Check: Power button दबाने से पहले यह देखिए
Pocket 3 mechanically stabilized gimbal camera है। Camera head के अंदर motors lens को तीन दिशाओं में balance करते हैं, इसलिए इसे normal fixed-lens camera की तरह हाथ से force करके घुमाना सही तरीका नहीं है।
Camera और gimbal के आसपास packing material, plastic film या ऐसी कोई चीज न हो जो startup movement रोक सके। Gimbal arm पर visible damage, unusual bend या foreign object नहीं होना चाहिए।
DJI manual gimbal movement में obstruction न होने, axes को unnecessary force न करने और sand/dust से mechanism बचाने की guidance देता है। Source: DJI Osmo Pocket 3 User Manual.
Water warning: Osmo Pocket 3 को waterproof action camera न समझें। बारिश, pool, समुद्र या पानी के छींटों में खुला इस्तेमाल avoid करें। Camera को liquid से बचाएँ और cleaning के लिए soft dry cloth use करें।
Protective Cover transport और storage में lens, screen और gimbal assembly को protect करता है। Camera चालू करने से पहले cover जरूर हटाएँ।
पहले Camera Charge करें
Pocket 3 को setup करते समय firmware update भी आ सकता है, इसलिए लगभग खाली battery के साथ शुरुआत करना सही नहीं है।
- Camera power off रखें।
- Included Type-C to Type-C cable लगाएँ।
- दूसरा end compatible USB-C charger में लगाएँ।
- Screen पर battery/charging indication देखें।
- Fast charging trigger होने पर screen पर Fast Charging indication दिख सकती है।
DJI compatible USB-C PD fast charging की guidance देता है। 65W charger mandatory नहीं है; DJI 65W और 30W USB-C charger जैसे compatible options list करता है। Source: DJI charging guidance.
65W charger का मतलब यह नहीं कि camera लगातार 65 watts consume करेगा। Charger की wattage उसकी maximum capability है; device supported charging profile के अनुसार power लेता है।
DJI lab figure के अनुसार 65W PD charger के साथ Pocket 3 लगभग 16 minutes में 80% और 32 minutes में 100% तक charge हो सकता है; actual time conditions के अनुसार बदल सकता है। Source: DJI specifications.
India beginner recommendation: किसी reliable brand का compatible USB-C PD charger लगभग 30W या उससे ऊपर उपलब्ध है तो वह practical starting choice है; केवल Pocket 3 के लिए 65W charger खरीदना setup की शर्त नहीं है।
microSD Card: Recording से पहले यह जरूरी है
Pocket 3 में normal recording के लिए built-in usable recording storage नहीं है; footage microSD card पर save होती है। Current specifications up to 1TB microSD support list करती हैं। Source: DJI Pocket 3 specifications.
U3 क्या है? UHS-I Speed Grade 3 / U3 card sustained video writing के लिए designed speed class है। High-resolution video लगातार data लिखता है; slow या fake card recording stop, card error या unreliable footage जैसी समस्या दे सकता है।
Card केवल capacity देखकर न खरीदें। Genuine seller और DJI-tested/recommended list को priority दें। Current DJI list में SanDisk Extreme Pro, Kingston Canvas Go! Plus / React Plus और कुछ Lexar Pro / SILVER PLUS capacities शामिल हैं।
Storage का rough practical estimate
Pocket 3 का official maximum video bitrate 130Mbps है। अगर planning के लिए लगातार 130Mbps को conservative reference मानें, तो theoretical upper-end recording time roughly यह बनता है। Actual recording time mode, bitrate behaviour और formatted capacity के अनुसार अलग होगा।
| Card | Approx. time at constant 130Mbps |
|---|---|
| 128GB | ~2.2 hours |
| 256GB | ~4.4 hours |
| 512GB | ~8.8 hours |
| 1TB | ~17 hours |
Beginner sweet spot: 256GB या 512GB अक्सर practical है, लेकिन genuine compatible card capacity से ज्यादा important है।
Card कैसे insert/remove करें?
Camera power off करें और official manual के microSD insertion diagram के अनुसार card orientation match करें। Abnormal resistance लगे तो force न करें। निकालते समय camera off करके card को हल्का press करें और spring release के बाद निकालें। Source: DJI User Manual.
Format कब करें?
नया card camera recognize कर ले और उस पर कोई जरूरी पुराना data न हो तो camera के अंदर format करना अच्छा setup step है। Formatting पूरा card erase/reinitialize करता है; यह selected file delete करने जैसा नहीं है।
Warning: जिस card में family photos या important footage हो, उसे backup के बिना format न करें।
First Power-On
Pocket 3 को touchscreen rotate करके या Shutter/Record button से power on किया जा सकता है। Startup पर gimbal head का controlled movement सामान्य है—motors initialize और position कर रहे होते हैं।
अगर gimbal physical object से टकरा रहा हो, लगातार uncontrolled vibration करे, unusual grinding/impact sound आए या persistent gimbal error दिखे, तो बार-बार force/restart न करें। Power off करके obstruction/damage check करें।
Initial language/setup prompts firmware/region के अनुसार बदल सकते हैं, इसलिए पुराने tutorial के हर screen-wording को exact match करने की जरूरत नहीं है।
Power off करने का straightforward तरीका Shutter/Record button press-and-hold है; screen-rotation power behaviour भी settings में configurable है। Source: DJI User Manual.
India में DJI Mimo App सही जगह से कैसे Install करें?
Research date 6 September 2026 पर DJI की official downloads page DJI Mimo Android v2.11.9 और Android 9.0 or above दिखाती है। Android पर official DJI page से APK download/install workflow दिया गया है। Random APK mirror, Telegram file, modded APK या unknown Drive link use न करें। Source: DJI Pocket 3 Downloads.
Android
- Phone browser में official DJI Pocket 3 Downloads / DJI Mimo page खोलें।
- Domain DJI का official domain confirm करें।
- Official Android DJI Mimo package download करें।
- Browser/Files app की Downloads section से APK खोलें।
- Android installation permission मांगे तो केवल official downloaded package के लिए required system prompt follow करें।
- Installation के बाद चाहें तो उस source की install-unknown-apps permission फिर off कर दें।
iPhone / iOS
Current India App Store listing DJI Mimo v2.11.9 के लिए iOS 15.0 or later दिखाती है। iPhone पर normal Apple App Store route use करें। Source: DJI Mimo on Apple App Store India.
Older manual या launch tutorial में minimum OS requirements अलग दिख सकते हैं। App compatibility के लिए current DJI download/App Store information को priority दें।
DJI Mimo activation, firmware update, remote live view/control, settings access और wireless file transfer जैसे कामों में उपयोग होता है।
Pocket 3 Activate कैसे करें?
DJI की current support guidance के अनुसार Pocket 3 activation DJI Mimo के जरिए होती है। Source: DJI activation guidance.
- Phone का Bluetooth और Wi-Fi ON रखें; Internet भी available रखें।
- Pocket 3 power on करें।
- DJI Mimo खोलें और nearby Pocket 3/device connection flow शुरू करें।
- Pocket 3 detect हो तो उसे select करें।
- Phone और camera पर connection/confirmation prompts ध्यान से follow करें।
- Wireless discovery के लिए OS जिस Bluetooth/Wi-Fi/nearby-device/location permission की मांग करे, relevant permission allow करें।
- Official Mimo activation flow पूरा करें।
DJI current activation support article login को अलग mandatory numbered step के रूप में स्पष्ट नहीं करती; इसलिए कोई invented screen wording यहाँ नहीं दी जा रही। Current Mimo sign-in/create-account prompt दे तो उसी official app के onscreen instructions follow करें।
Camera detect नहीं हो रहा?
- Wi-Fi और Bluetooth दोनों ON confirm करें।
- DJI Mimo current version पर रखें।
- Required app permissions check करें।
- Mimo और Pocket 3 restart करें।
- Camera Settings में Wireless Connection reset try करें।
- जरूरत पर supported Wi-Fi band option बदलकर retry करें।
DJI Mimo connection troubleshooting में permissions, reconnect/reset और wireless-band checks शामिल हैं। Source: DJI Mimo connection troubleshooting.
Serious Recording से पहले Firmware Update करें
6 September 2026 के currentness check पर DJI downloads page का latest listed Pocket 3 release-note document 26 August 2025 का है और firmware v01.06.10.04 list करता है। Source: DJI Pocket 3 Downloads और Release Notes PDF.
- Camera अच्छी तरह charge रखें; DJI beginner guidance कम-से-कम 15% battery बताती है।
- Phone Wi-Fi और Bluetooth ON रखें।
- Pocket 3 को DJI Mimo से connect करें।
- Available firmware prompt आए तो update चुनें।
- Update के दौरान camera/app को unnecessarily बंद न करें।
- Camera restart हो सकता है; यह सामान्य है।
- Update के बाद firmware version दोबारा check करें।
Update fail हो तो camera और Mimo restart करें, Wi-Fi/Bluetooth ON रखें, reconnect करके retry करें। Repeated official-app failure पर DJI Support से संपर्क करें।
पुराने 2023 tutorial में कुछ settings/features अलग हो सकती हैं क्योंकि बाद के firmware में नए capabilities जोड़े गए हैं। Launch-day UI को current final UI न मानें।
दो Main Physical Controls समझ लें
Beginner के लिए Shutter/Record Button और 5D Joystick सबसे जरूरी physical controls हैं।
| Action | क्या होता है | Beginner use |
|---|---|---|
| Shutter/Record short press | Mode के अनुसार photo capture या video start/stop | Record start/stop |
| 5D single press | Back; tracking में exit भी कर सकता है | Menu से वापस |
| 5D double press | Gimbal recenter | View फिर सीधा सामने |
| 5D triple press | Camera direction front/back switch | Selfie ↔ front |
| 5D left/right | Gimbal pan | View बाएँ-दाएँ |
| 5D up/down | Tilt या zoom, slider setting पर निर्भर | View/zoom adjustment |
| 5D press-and-hold | Temporary gimbal lock | Direction temporarily lock |
Exact button/joystick actions current manual से verify किए गए हैं। Source: DJI User Manual.
Current firmware warning: later firmware में recording के दौरान Shutter/Record button long-hold से recording cancel/discard behavior जोड़ा गया था। इसलिए recording के बीच button unnecessarily long-hold न करें। Source: DJI Release Notes.
Touchscreen Gestures: बस ये चार याद रखें
| Gesture | काम |
|---|---|
| Top → down swipe | Control Menu |
| Bottom → up swipe | Current shooting parameters जैसे resolution/frame rate |
| Left edge → right swipe | Playback |
| Right edge → left swipe | Image/audio-related parameters |
गलती से कोई menu खुल जाए तो 5D joystick एक बार press करना convenient Back control है। यही एक चीज याद रखने से छोटी touchscreen में navigation आसान हो जाती है।
Screen Rotation: Landscape और Portrait कैसे काम करते हैं?
Landscape normal YouTube, TV, computer और general family/travel video के लिए convenient है। Portrait Instagram Reels, YouTube Shorts और vertical social video के लिए।
Screen Rotate & Capture enabled हो तो screen rotate करके camera power on करते ही shooting automatically start हो सकती है। यह fast capture के लिए useful है, लेकिन beginner accidental recording कर सकता है।
पहले दिन Recommendation: Screen Rotate & Capture initially OFF रखें। Recording normal Record button से शुरू करना सीखें।
Recording शुरू होने के बाद shooting orientation lock रहती है; बीच recording screen rotate करना existing clip को suddenly horizontal से native vertical नहीं बनाता।
Gimbal क्या है और पहले दिन कौन-सा Mode रखें?
Gimbal छोटे motors वाला stabilization system है। Handle का angle बदले तो camera head movement को smooth करने की कोशिश करता है।
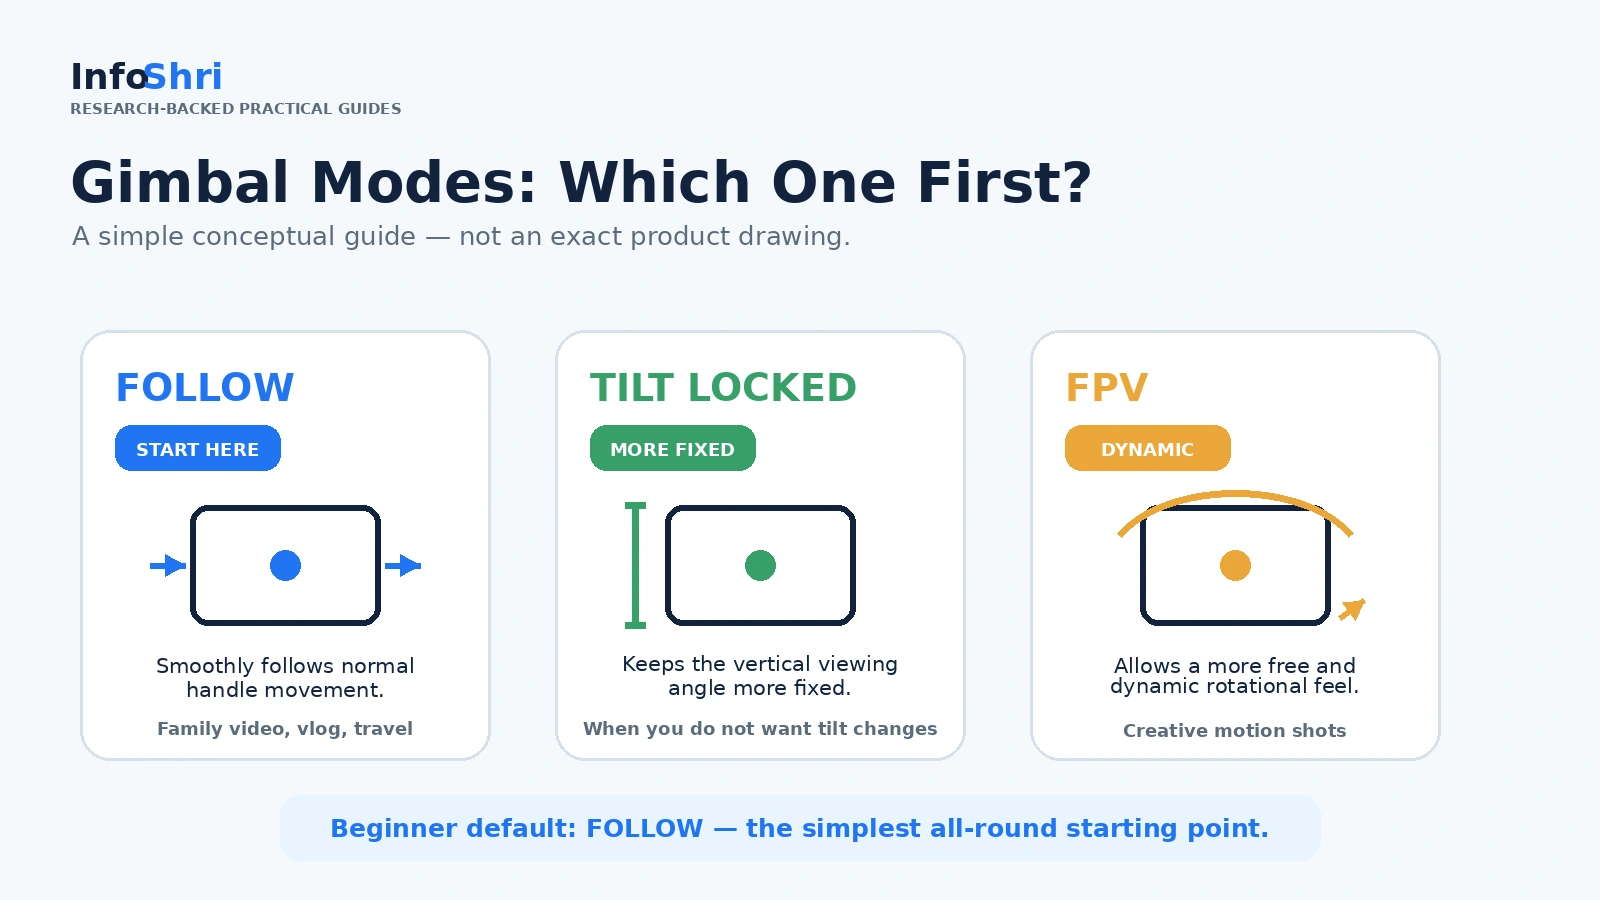
Follow
Camera pan/tilt handle movement को smooth तरीके से follow करता है और normal vlog/selfie/everyday use के लिए सबसे आसान starting mode है। पहले दिन Follow रखें।
Tilt Locked
Vertical tilt ज्यादा fixed रहता है जबकि horizontal direction follow कर सकती है। जब आप चाहते हैं कि camera ऊपर-नीचे न झुके, तब useful है।
FPV
Handle movement के साथ ज्यादा free/dynamic rotational feel देता है। First-day general shooting के लिए जरूरी नहीं।
5D joystick double press से recenter और triple press से front/selfie direction switch कर सकते हैं। Press-and-hold temporary gimbal lock के लिए useful है।
Calibration को routine ritual न बनाएं। Noticeable drift/crooked alignment हो और recenter से ठीक न हो तब flat stable surface पर calibration relevant हो सकती है।
पहली Recording से पहले ये Settings रखिए
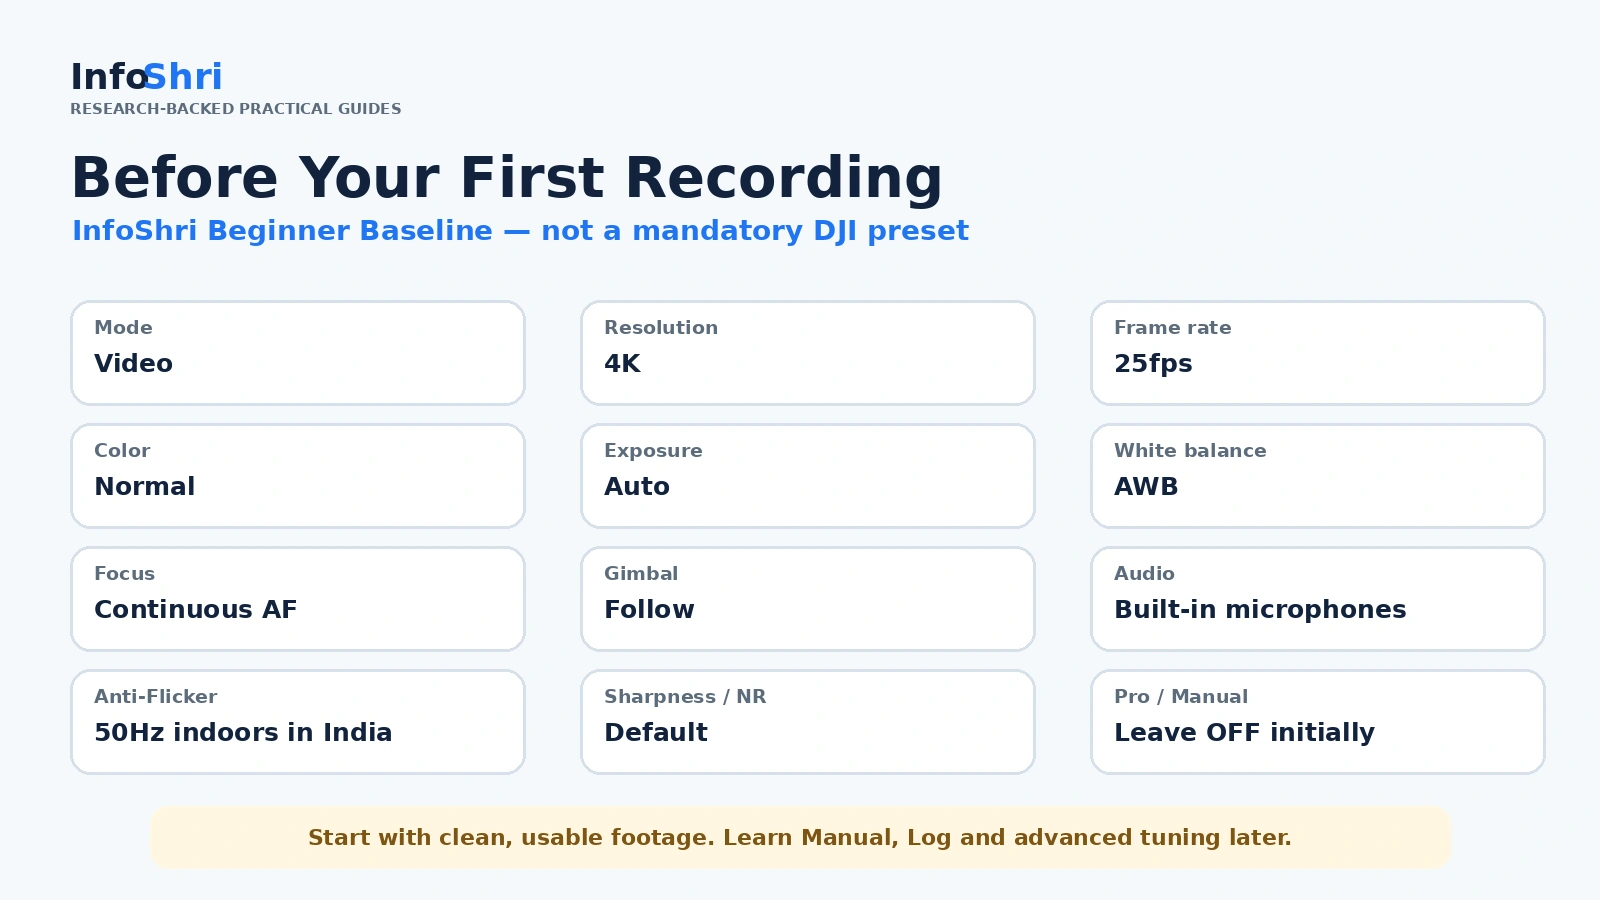
Goal cinematic expert settings नहीं, पहली बार में clean, usable footage है।
| Setting | Beginner recommendation | क्यों? |
|---|---|---|
| Mode | Video | सबसे simple |
| Resolution | 4K | अच्छी detail |
| Frame Rate | 25fps | India 50Hz indoor environment के साथ convenient baseline |
| Color | Normal | Editing/grading जरूरी नहीं |
| Exposure | Auto | Camera brightness संभाले |
| ISO | Auto | Day 1 पर manual नहीं |
| Shutter | Auto | Beginner के लिए safer |
| White Balance | AWB | Camera colour temperature संभाले |
| Focus | Continuous AF | Moving family/vlog के लिए practical |
| Gimbal | Follow | Simple all-round mode |
| Audio | Built-in microphones | Extra gear जरूरी नहीं |
| Anti-Flicker | 50Hz indoors in India | Mains-light flicker कम करने में मदद |
| Sharpness / NR | Default | बिना reason न बदलें |
| Codec | Default / HEVC | Efficient; compatibility issue हो तो H.264 |
| Grid | 3×3 optional ON | Framing सीखने में मदद |
| Pro Mode | OFF | पहले basics सीखें |
Pocket 3 normal 4K video में 24/25/30/48/50/60fps support करता है और H.264/HEVC codec options देता है। Source: DJI Specifications.
यह InfoShri editorial beginner baseline है, DJI का mandatory preset नहीं। 4K heavy लगे तो 1080p 25fps भी valid casual option है।
D-Log M intentionally flat-looking profile है जिसे grading workflow के लिए बनाया गया है; first-day ready-to-use footage के लिए Normal colour आसान है।
Exposure, ISO और shutter useful manual controls हैं, लेकिन गलत combination पहली clip को unnecessarily dark, bright या jerky बना सकता है। पहले Auto से शुरुआत करें।
India में 50Hz / Anti-Flicker क्यों Important है?
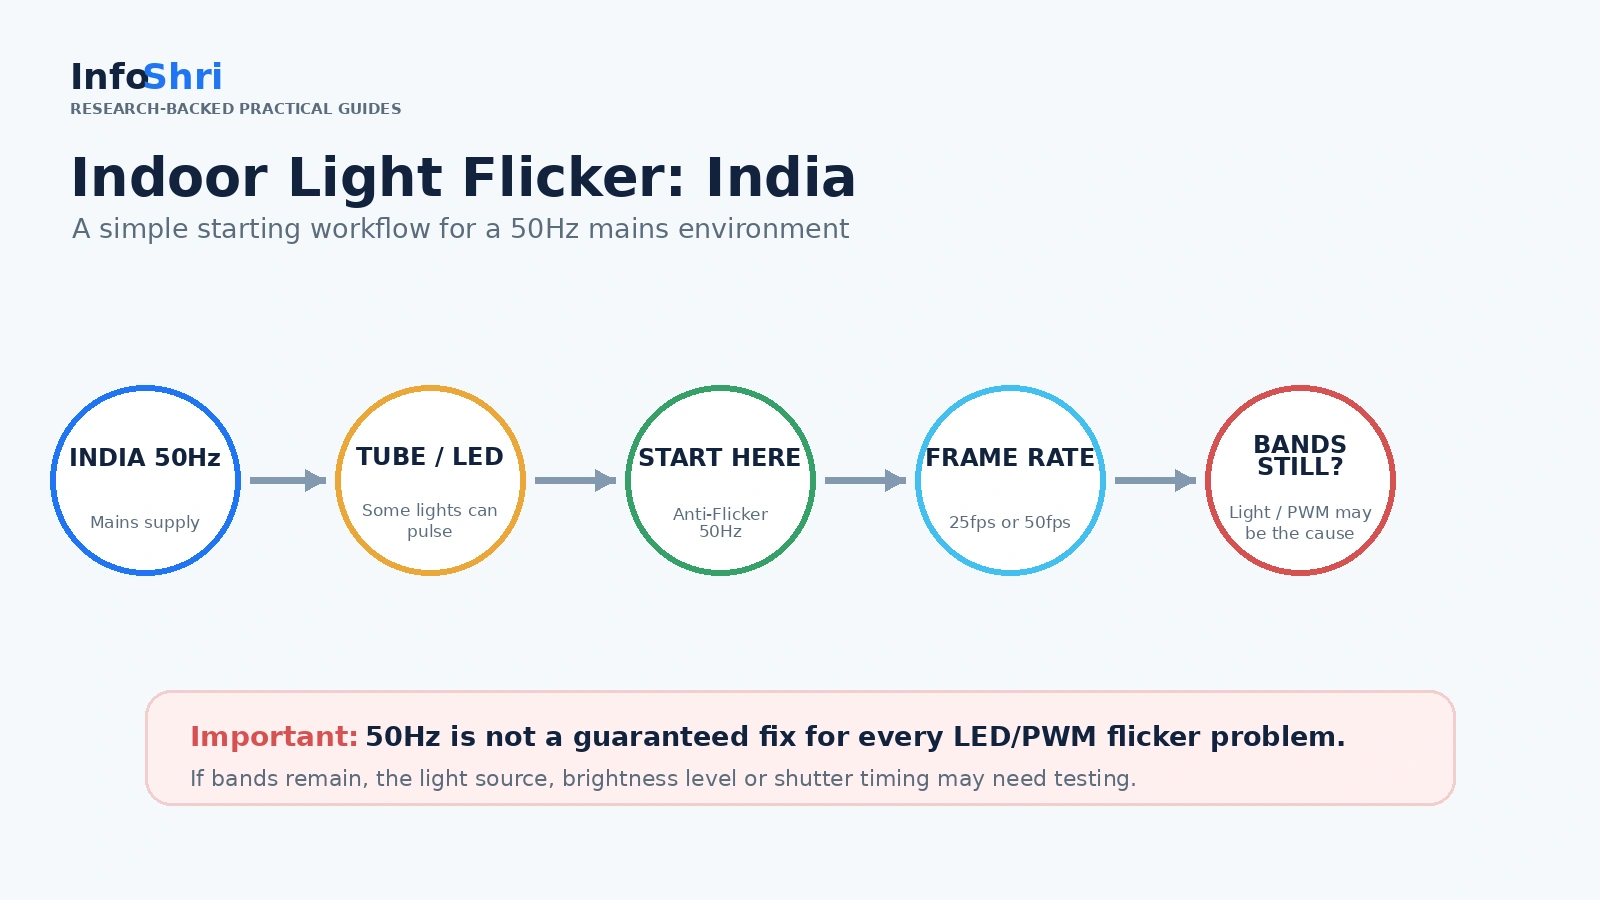
भारत का nominal mains environment 50Hz है। Source: BIS 50 Hz reference. Indoor tube lights और कुछ LED drivers brightness cycle कर सकते हैं, जिससे video में bands/pulsing दिखाई दे सकते हैं।
Beginner starting point: indoor mains-powered lights में Anti-Flicker 50Hz रखें। General recording में 25fps या जरूरत पर 50fps convenient choices हैं।
बाद में manual mode सीखें तो 25fps के साथ लगभग 1/50 sec और 50fps के साथ लगभग 1/100 sec कुछ mains-related flicker situations में useful starting points हो सकते हैं। पहले दिन shutter Auto रहने दें।
Limitation: Anti-Flicker हर LED problem की universal fix नहीं है। कुछ LEDs PWM या अलग electronic pulsing use करती हैं। Bands रहें तो 25fps try करें, light source/brightness बदलें और जरूरत पड़ने पर ही manual shutter test करें।
Autofocus: Beginner के लिए कौन-सा Mode?
Autofocus camera को subject sharp रखने के लिए lens focus adjust करने देता है।
Single Focus / AFS
Camera एक बार focus करके वहीं रुकता है। Static subject के लिए useful।
Continuous Focus / AFC
Subject distance बदलने पर focus लगातार update करता है। Normal family video, walking vlog, travel और moving subject के लिए best beginner default है।
Product Showcase
Lens के करीब दिखाई चीज को priority देने के लिए useful, जैसे camera के सामने gadget/product दिखाना।
Official focus range 0.2m से infinity है—यानी लगभग 20cm minimum focus distance। Source: DJI Specifications.
अगर product lens से 5cm दूर है और blur है, तो camera खराब होना जरूरी नहीं; subject थोड़ा पीछे लें।
Autofocus ≠ ActiveTrack: autofocus sharpness संभालता है; ActiveTrack gimbal को subject को frame में follow करने में मदद करता है।
ActiveTrack पहली बार कैसे Use करें?
Photo या normal Video mode में subject screen पर साफ रखें और subject पर double-tap करके tracking select करें। Tracking frame दिखाई देना चाहिए।
Tracking stop करने के लिए 5D joystick single press या tracking selection remove करें।
Solo vlog में selfie direction करके face frame में रखें और simple tracking test लें। Subject पूरी तरह obstruct हो जाए, बहुत छोटा/low-contrast हो या shooting mode tracking support न करे तो tracking reliable नहीं रहेगी।
DJI beginner guide और manual mode-specific tracking availability/limitations document करते हैं। Sources: DJI First Use guide, DJI User Manual.
First Video के लिए Audio Setup
Pocket 3 body में तीन built-in microphones हैं। Source: DJI Specifications. पहले दिन external mic जरूरी नहीं है।
General family/travel recording में built-in microphones से शुरू करें, wind हो तो Wind Noise Reduction consider करें और important shoot से पहले 10-second audio test बनाएं।
Simple audio check: normal आवाज में बोलें “Pocket 3 audio test — one two three”, फिर playback में देखें कि आवाज साफ है, बहुत low नहीं, हवा का noise excessive नहीं और mic हाथ से block नहीं हुआ।
Creator Combo में DJI Mic 2 है तो
Verified India Creator Combo listing में एक DJI Mic 2 Transmitter included है। Source: DJI India Creator Combo listing.
Compatible wireless mic pairing current camera Wireless Microphone menu से किया जा सकता है। Transmitter linking/pairing mode में रखें, connection complete करें, audio-level indicator देखें और test recording जरूर करें।
Mic chest के आसपास reasonably close रखें और कपड़े से rubbing avoid करें। Outdoor wind में compatible windscreen use करें।
External wireless mic के साथ built-in mic backup audio feature कुछ modes में useful insurance हो सकता है; availability firmware/mode के अनुसार check करें।
अब अपना पहला Successful Video Record करें
- Protective Cover हटाएँ: Lens/gimbal पूरी तरह free हो।
- Camera power on: Record button या screen rotation से।
- Landscape चुनें: पहली test clip के लिए horizontal simple है।
- Baseline check: Video, 4K, 25fps, Normal, Auto exposure, AWB, Continuous AF, Follow, built-in audio और indoor में 50Hz Anti-Flicker।
- Subject frame करें: किसी व्यक्ति/object को reasonable distance पर रखें।
- Focus check: subject sharp दिखे; जरूरत हो तो screen पर tap करें।
- Audio check: mic blocked न हो और speaker बहुत दूर न हो।
- Record दबाएँ: timer/status देखकर confirm करें कि recording शुरू हुई।
- 10–15 sec clip बनाएं: पहले कुछ seconds stationary रहें, फिर धीरे दो-तीन कदम चलें।
- Stop: Record button short press।
- Playback: Left edge से right swipe करके clip खोलें।
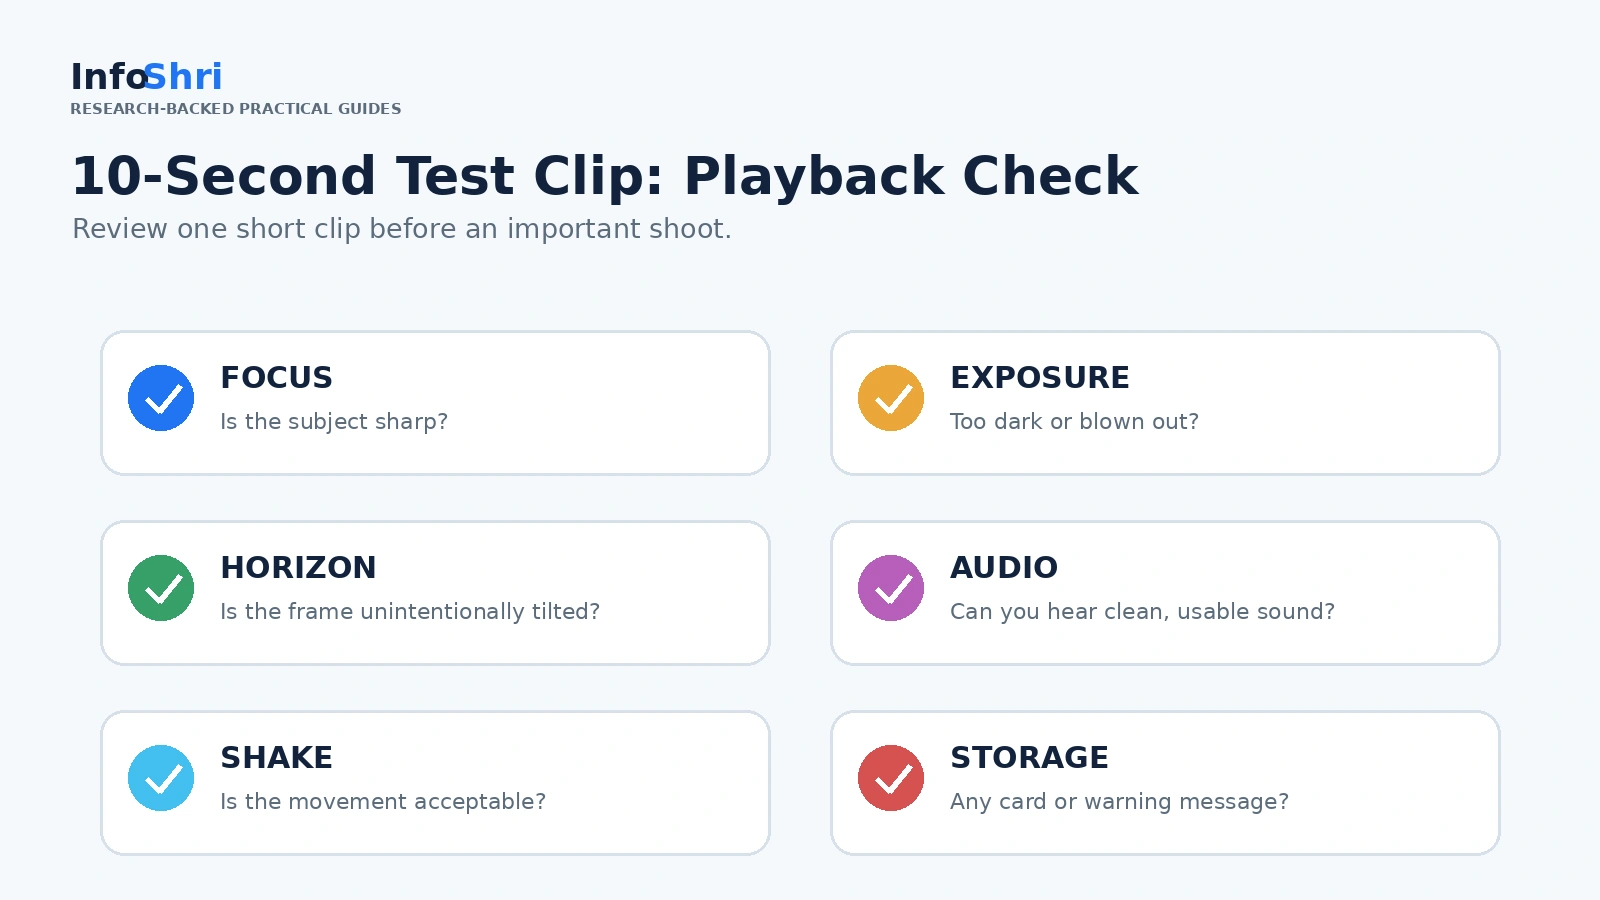
- Check: focus, horizon, exposure, clipping, audio, shake और storage warning देखें।
ये checks ठीक हैं तो आपका पहला usable Pocket 3 clip सफल है।
First Selfie / Vlog Recording
5D joystick triple press से camera direction selfie/front switch करें। Camera लगभग eye level पर रखें; बहुत नीचे से angle लेने पर chin/nose-heavy framing हो सकती है।
Pocket 3 की lens wide है, इसलिए face से जरूरत से ज्यादा पास रखने की जरूरत नहीं। 20cm minimum focus distance याद रखें।
Solo walking vlog में ActiveTrack useful हो सकता है, लेकिन tracking के बिना भी पहला test लें ताकि आपको natural gimbal behavior समझ आए।
Gimbal hand shake को smooth करता है, लेकिन walking की vertical up/down body bounce को पूरी तरह खत्म नहीं करता। Soft छोटे steps result improve कर सकते हैं।
First Instagram Reel / YouTube Short
Pocket 3 native portrait video support करता है। Current specs के अनुसार normal 9:16 video में up to 3K (1728×3072) और 24/25/30/48/50/60fps options available हैं। Source: DJI Specifications.
- Orientation: Portrait
- Resolution: 3K 9:16
- Frame rate: 25fps as a simple India baseline
- Colour: Normal
- Exposure: Auto
- Focus: Continuous
- Gimbal: Follow
- Audio: built-in or correctly connected wireless mic
30fps भी social media के लिए usable है; indoor India 50Hz environment में 25fps convenient starting choice है।
पहला Low-Light Video
Pocket 3 dedicated Low-Light Video mode support करता है; official specs 4K 24/25/30fps और mode-dependent ISO range up to 16000 list करती हैं। Source: DJI Specifications.
ISO 16000 का मतलब dark room में clean daylight जैसा footage guarantee नहीं है। पहले available real light बढ़ाएँ, subject को light के करीब रखें, camera steady रखें और जरूरत पर Low-Light mode try करें।
Footage देखें, Delete करें और Card Protect रखें
Left edge से right swipe करके Playback खोलें। Delete करते समय selected file confirm करें। एक clip delete करना और पूरा card format करना अलग operations हैं।
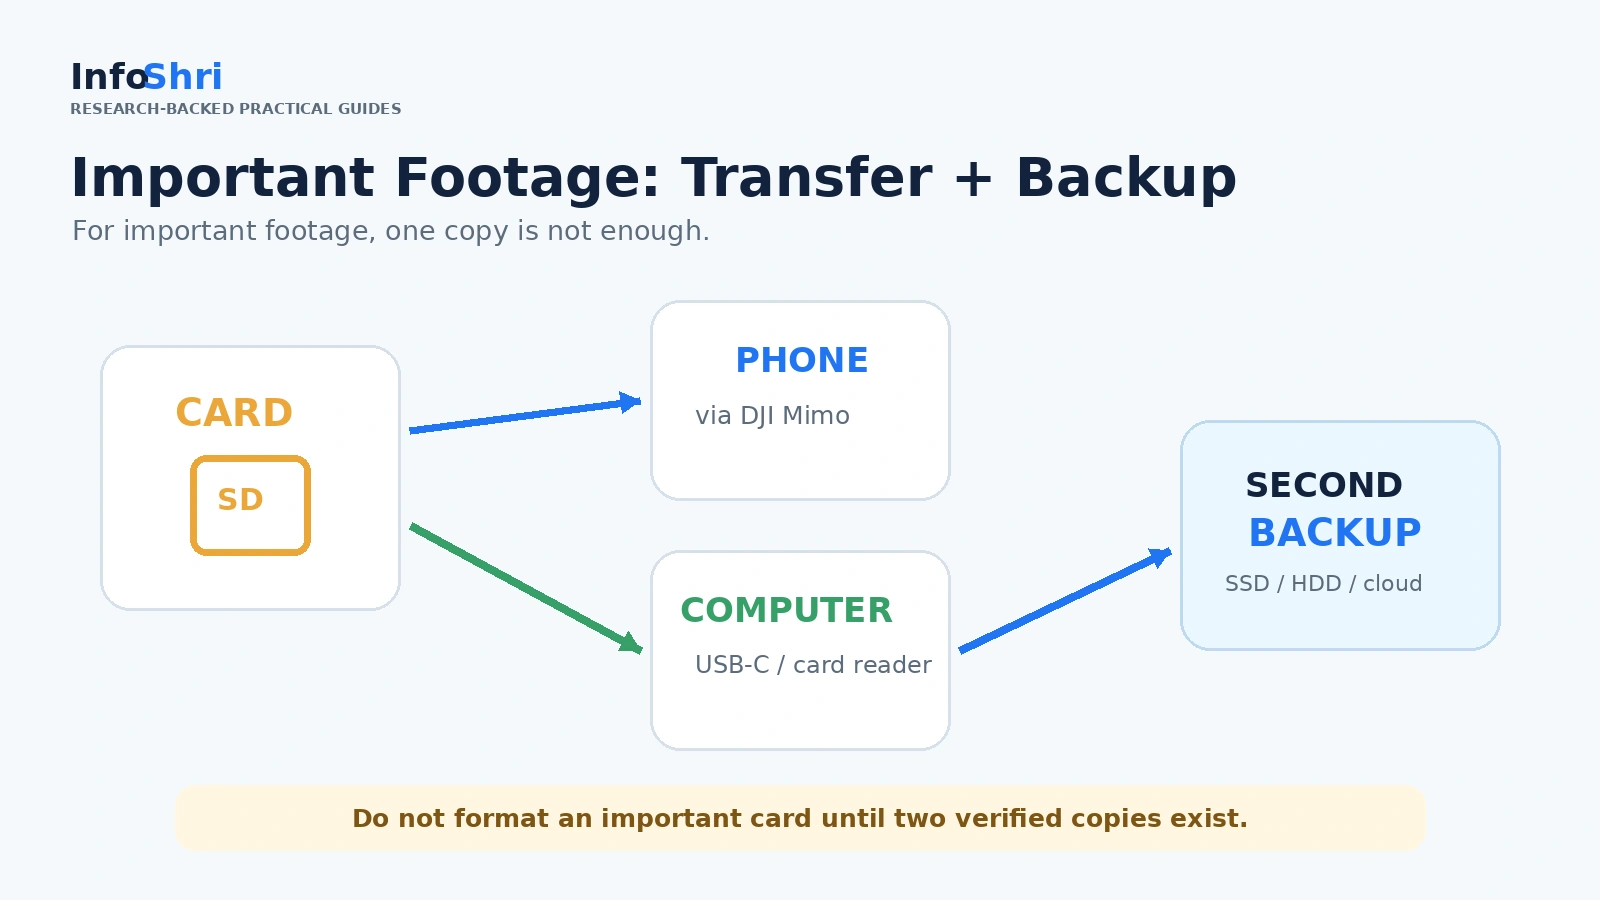
Card full हो तो safest habit है: footage copy करें → important files open करके verify करें → second backup बनाएं → उसके बाद card reuse/format करें।
Videos Phone में Transfer कैसे करें?
- Phone Wi-Fi/Bluetooth ON रखें।
- Pocket 3 power on करें।
- DJI Mimo खोलें।
- Camera connect करें।
- Playback/Album में required clips चुनें।
- Phone storage पर्याप्त हो तो download करें।
DJI Mimo wireless file viewing/download workflow official documentation में supported है। Source: DJI User Manual.
4K files बड़े हो सकते हैं, इसलिए phone free storage check करें। Wired/OTG transfer supported phone/cable behaviour पर निर्भर कर सकता है; हर Android phone को identical मानकर instruction follow न करें।
Wireless transfer fail हो तो Mimo update, Wi-Fi/Bluetooth, permissions, phone storage, camera restart और wireless connection reset check करें।
Videos PC / Mac में Transfer
Method A — Camera को USB-C से connect करें
- Pocket 3 power on करें।
- USB-C data cable से computer connect करें।
- Camera screen पर connection mode आए तो File Transfer चुनें।
- Computer पर device/removable storage खोलें।
- Original video files copy करें।
- Transfer complete होने पर safely eject/disconnect करें।
Method B — microSD Card Reader
Camera power off करके microSD निकालें और card reader में लगाएँ। बहुत सारी 4K footage transfer करनी हो तो card reader convenient हो सकता है।
Simple backup rule: CARD → COMPUTER → SECOND BACKUP. Important footage की दो verified copies बनने से पहले card format न करें।
First Day के बाद Battery Basics
Pocket 3 की internal battery 1300mAh है। DJI का headline maximum operating-time reference 166 minutes है, लेकिन यह 25°C पर 1080p/24fps, Wi-Fi off और screen off जैसी lab conditions में measured reference है। Source: DJI Specifications.
Normal 4K recording, screen use, Wi-Fi, tracking और temperature runtime बदलते हैं। इसलिए headline runtime को हर shooting mode की guarantee न समझें।
Camera compact है और recording में warm होना अपने-आप defect नहीं है। Official operating range 0°C to 40°C और charging range 5°C to 45°C है। Overheat warning आए तो direct sun से हटाएँ, airflow block न करें, unnecessary charging + demanding recording combination avoid करें और device को cool होने दें।
Pocket 3 को Safely Store कैसे करें?
- Recording stop करें और camera power off करें।
- Gimbal को shutdown position में settle होने दें।
- Lens पर fingerprints/dust हो तो soft clean cloth से साफ करें।
- Camera dry रखें।
- Protective cover सही orientation में लगाएँ।
- Bag में heavy charger/power bank का pressure gimbal पर न पड़े।
India heat/dust/humidity में parked car के बहुत गर्म cabin में लंबे समय न छोड़ें, sand/dust से moving mechanism बचाएँ और wet camera को तुरंत बंद humid pouch में seal न करें। Pocket 3 के लिए waterproof rating assume न करें।
Pocket 3 की 25 Beginner Mistakes
- microSD card लगाए बिना recording के लिए निकल जाना।
- Fake या बहुत slow card खरीदना।
- SD card को उल्टा force करना।
- Important card बिना backup format करना।
- Protective cover लगे रहते camera power on करना।
- Gimbal को हाथ से बार-बार जबरदस्ती मोड़ना।
- Pocket 3 को waterproof action camera समझना।
- Random website से DJI Mimo APK download करना।
- 2023 tutorial के पुराने app/menu requirements को current मान लेना।
- Firmware update ignore करना।
- Firmware update लगभग empty battery पर शुरू करना।
- पहले दिन D-Log M on करके flat colour देखकर camera खराब समझना।
- Manual ISO/Shutter केवल किसी YouTube ‘cinematic settings’ advice के कारण set करना।
- हर चीज 4K120 में shoot करना।
- ND filter indoor में लगा छोड़ देना।
- Product को lens से minimum focus distance से भी पास लाकर focus expect करना।
- Autofocus और ActiveTrack को एक ही feature समझना।
- ActiveTrack हर mode में available expect करना।
- Gimbal से vertical walking bounce पूरी तरह खत्म होने की उम्मीद करना।
- Recording timer/status check न करना।
- External mic connect होने को perfect audio की guarantee समझना।
- Important event से पहले 10-second test clip न बनाना।
- India indoor flicker में 50Hz/25fps basics check न करना।
- Footage का सिर्फ एक copy रखना।
- Recording के दौरान Shutter/Record button unnecessarily long-hold करना, जबकि current firmware में cancel/discard behaviour लागू हो सकता है।
First-Time Troubleshooting
| Problem | पहले क्या check करें | Safe fix | DJI Support कब |
|---|---|---|---|
| Camera ON नहीं हो रहा | Battery/charger/cable | Compatible USB-C PD source से charge करें; normal power-on retry | Known-good charging के बाद भी dead |
| Mimo camera नहीं ढूँढ रहा | Wi-Fi, Bluetooth, permissions, current app | Restart app/camera; Wireless Connection reset; band change if needed | Persistent detection failure |
| Activation fail | Internet + connection | Reconnect Mimo और official flow retry | Repeated official-app failure |
| Firmware update fail | Battery >15%, connection | Restart camera + Mimo; reconnect and retry | Repeated retry failure |
| SD card detect नहीं | Card seating/compatibility | Power off, reseat; known-good compatible card; backup/format if appropriate | Multiple known-good cards fail |
| Recording stop | Card/heat/storage | Free space, compatible card, heat warning check | Normal conditions में repeated stops |
| Gimbal crooked | Obstruction/alignment | Recenter; calibration only if needed on stable surface | Collision/damage/persistent error |
| Autofocus blur | Subject <20cm? Low light? | Subject पीछे लें; Continuous AF; adequate light | Normal distance/light में persistent failure |
| ActiveTrack नहीं | Shooting mode | Normal supported Photo/Video mode test | Supported mode में absent after update |
| Wireless mic नहीं जुड़ रहा | Pairing/firmware | Wireless Microphone menu; transmitter pairing; retry | Compatible updated mic still fails |
| Audio नहीं/low | Mic blocked/level/input | 10-second test; reconnect input/mic | Hardware audio repeatedly absent |
| Screen orientation confusion | Portrait/Landscape/Auto | एक orientation रखें; Rotate & Capture OFF | Normal UI controls respond न करें |
| Camera warm | High fps/4K/charging/sun | Shade, airflow, lower demand, cool-down | Repeated overheat under normal use |
| Phone transfer fail | Wi-Fi/storage/permissions | Mimo reconnect; free storage; wireless reset | Multiple phones fail |
| PC transfer fail | Cable/data mode/card | File Transfer; data cable/port/card reader test | Camera/card inaccessible everywhere |
Camera गिरा हो, gimbal mechanically damaged दिखे, liquid अंदर गया हो, burning smell आए या repeated hardware error हो तो DIY force/repair न करें।
5-Minute Quick Setup Checklist
- [ ] Box contents package के अनुसार verify किए
- [ ] Protective material और cover हटाया
- [ ] Gimbal obstruction check किया
- [ ] Camera charge किया
- [ ] Genuine compatible U3 microSD लगाया
- [ ] Old card data हो तो backup किया
- [ ] Camera power on किया
- [ ] Official DJI Mimo install किया
- [ ] Phone Wi-Fi + Bluetooth ON
- [ ] Pocket 3 activate किया
- [ ] Firmware update check किया
- [ ] microSD camera में format किया, if safe/appropriate
- [ ] Orientation चुनी
- [ ] Screen Rotate & Capture शुरुआती setup में OFF
- [ ] Video 4K 25fps
- [ ] Normal colour
- [ ] Exposure/ISO/Shutter Auto
- [ ] AWB
- [ ] Continuous AF
- [ ] Follow gimbal mode
- [ ] India indoor shooting में Anti-Flicker 50Hz
- [ ] Built-in mic/audio check
- [ ] 10–15 second test clip record किया
- [ ] Playback में focus/exposure/horizon/audio देखा
- [ ] Important footage computer पर copy की
- [ ] Second backup रखा
- [ ] Power off करके protective cover लगाया
पहले दिन इन Settings को मत छेड़िए
ये खराब features नहीं हैं। बस first-day learning के लिए जरूरी नहीं।
| Setting | अभी क्यों छोड़ें? |
|---|---|
| D-Log M | Flat 10-bit profile है; grading workflow समझने पर useful |
| HLG | HDR output/edit/display workflow की जरूरत हो तभी |
| Manual Shutter | Wrong value motion/flicker को खराब कर सकती है |
| Manual ISO | Auto से exposure basics सीखना आसान |
| Manual White Balance | Controlled lighting में useful; first day AWB enough |
| Sharpness / Noise Reduction | Default को benchmark बनाए बिना adjustment judge करना मुश्किल |
| 4K120 | Special slow-motion mode; everyday default नहीं |
| Timecode | Multi-camera professional sync use case |
| LUT workflow | Normal colour footage के लिए जरूरी नहीं |
| Complicated custom modes | Repeated personal presets समझ आने के बाद useful |
पहले camera चलाना सीखिए, फिर camera को manually control करना। उल्टा करने पर menu याद रह जाता है लेकिन अच्छे clips नहीं बनते।
Basics सीखने के बाद आगे क्या?
जब ऊपर वाला workflow बिना सोचे कर सकें, तब deeper topics सीखना आसान होगा: complete Pocket 3 feature/spec deep dive, best settings, ActiveTrack guide, D-Log M, ND filters, wireless audio और low-light optimization।
Bottom Line: नई Pocket 3 हाथ में हो तो क्या याद रखें?
पहला: Camera safely तैयार करें—cover हटाएँ, gimbal force न करें और सही microSD लगाएँ।
दूसरा: Official DJI Mimo से activation और current firmware check पूरा करें।
तीसरा: Simple baseline से शुरू करें—4K 25fps, Normal colour, Auto exposure, AWB, Continuous AF, Follow mode और India indoor lighting में 50Hz Anti-Flicker।
चौथा: Important shoot से पहले हमेशा 10-second test → playback → focus → exposure → audio check करें।
नई camera की पहली recording किसी important trip, शादी या family event पर सीखने की बजाय घर पर छोटा test कर लें। इससे microSD, focus, microphone, orientation, firmware और settings की बड़ी beginner mistakes पहले ही पकड़ में आ जाती हैं।
Sources
- DJI — Osmo Pocket 3 Downloads
- DJI — Osmo Pocket 3 Specifications
- DJI — Osmo Pocket 3 FAQ
- DJI — Osmo Pocket 3 User Manual v1.0 (2025-08-26)
- DJI — Osmo Pocket 3 Release Notes (2025-08-26)
- DJI Support — Osmo Pocket 3 First Use / Beginner Guide
- DJI Support — Osmo Pocket 3 Activation
- DJI Support — Osmo Pocket 3 Charging
- DJI Support — DJI Mimo Connection Troubleshooting
- DJI India Shop — Osmo Pocket 3 Standard Combo
- DJI India Shop — Osmo Pocket 3 Creator Combo
- Apple App Store India — DJI Mimo
- Bureau of Indian Standards — 50 Hz supply-frequency reference

Keep exploring